Abstract: A new method of detecting neutrality of a hydraulic control valve using a pneumatic gauge is proposed. This method is a fast and practical detection method for the type test of the product stereotypes and the online quality sampling of the mass production of the product. The neutrality of the hydraulic control valve directly affects the static and dynamic characteristics of the valve. For example: the three-way valve reset on the quality of neutral will affect the size of the median valve leakage; domestic flow control valve L-type throttle and Q-speed valve structure on the neutral good or bad To the amount of leakage changes, so that the static characteristics of the change; electro-hydraulic servo valve on the quality of the adverse impact on the pressure gain and bias and so on. Therefore, the hydraulic control valve type test and factory test, the performance as a pilot project in the test content. Hydraulic method to detect the performance of the time-consuming, laborious, energy-hungry, at the same time as the flow through the small gap "jam" phenomenon caused by inaccurate detection. Application of flow (buoyant) pneumatic measuring instrument, due to the transient measurement, so quick and easy; its magnification, no "plugging" phenomenon, so the test is accurate; it detects the use of low pressure, consumption Less time, less energy consumption. Flow pneumatic instrument is actually a buoyant flowmeter. The constant pressure of compressed air flows through the orifice into the conical tube of the flowmeter. The airflow holds the buoy to a certain height and then flows to the nozzle along the annular gap around the buoy, then escapes into the atmosphere from the measurement gap. If the pneumatic gauge probe or measuring device is removed, then through the buoy ring around the air gap directly to the hydraulic control valve sealing gap jet, then with the sealing gap, through the sealing area of ​​the gas flow (leakage) is different, the buoy The indication height is also different [2]. Neutral good or bad, will affect the leakage changes, so the pneumatic gauge float position will change. 1 Pneumatic measuring instrument used to detect the reset of the three spool neutral detection principle shown in Figure 1. Pneumatic gauge of the two tubes with the same reference calibration. Will be back to the oil port E, F blocked, control port A, B were connected a, b pneumatic tube, from the inlet C exhaust. If the pneumatic gauge buoy height of two tubes is basically the same, then the air flow through the middle of the slide valve sealing tape m, n leakage gas volume is basically the same, indicating that the reset valve spool good neutrality, of which the total amount of leakage should Is the smallest. If the two buoys are inconsistent, the higher ones indicate that the sealing band has a large amount of leakage and a low amount of leakage, and its reset neutrality is not good and the total amount of leakage in the valve is increased. Pneumatic gauge buoy height instructions translated into a slide valve leakage of liquid can be seen in reference [3]. Figure 1 Pneumatic three-position ball valve to detect neutral principle 1. Pump 2. Water separator 3. Pressure reducing valve 4. Shut-off valve 5. Pressure gauge 6. QFP-5-5 Flow Pneumatic Meter 7. 35D-10B specimen It should be noted here is: Pneumatic gauge buoy position is the height of the seal that means "integrated" the size of the gap, it is sealed with the seal length and sealing gap size, and shoulder and undercut The degree of the sharp edge of the groove control edge and the processing accuracy of the shoulder and the valve hole and other factors. Therefore, the neutrality here does not mean that the amount of occlusion of the negative opening of the middle finger is symmetrical, but is measured by whether the amount of leakage is consistent or not. If the processing accuracy is high, the general amount of cover should be basically symmetrical. If the neutral is not good, in the test used to move the valve spool to change its cover the amount of test methods. Structurally available to change the length of the reset spring to solve. The test data in Table 1. The median amount of leakage of the tested valve after the move showed that the leakage of valve No. 5 was significantly reduced by about 3.5 mL / min before the shift. The remaining 1, 2, 3 also reduced 1 ~ 2mL / min. For the electro-hydraulic servo valve selected specimen is FM-31 type, the valve is in the middle of each valve port near zero openings. Can also be measured with the method of Figure 1 for testing, and then according to the measurement results of the valve spool shoulder with close to zero openings, the test can be found in reference [4]. 2 Pneumatic meter to detect the design of the throttle on the neutral Table 1 Three-way spool valve neutral test data items test piece number 1 2 3 4 5 buoy location (grid) a tube -7.5 -5.5 -8.5 -9.0 -9.0 b Tube -7.0 -7.0 -7.5 -9.0 -4.0 Spindle axial movement (mm) Right shift 0.10 Right shift 0.15 Right shift 0.20 0 Right shift 0.30 Position of the buoy after moving (cell) a Tube -7.3 -6.4 -8.2 -9.0 -6.6 b Tube -7.3 -6.4 -8.2 -9.0 -6.6 The principle of detection is shown in Fig. Using a tube of a dual-tube pneumatic gauge, block a during calibration, and zero the set screw so that the buoy is in the "0" position. Select a leakage of 20mL / min throttle connected by the map, adjust the ratio can be good. A meter instrument connected to the throttle inlet A, airflow through the m sealing tape through the orifice E from the oil outlet B, while the air flow through the n-sealing triangle flow through the handle B from the B port. When the handle G is dead, if the valve core, valve hole machining accuracy, m and n are equal, then the throttle valve internal leakage should be minimal. If the triangle groove processing is not accurate, or the handle is dead when the limit is not good so that m ≠n, then the amount of leakage will increase. Even when m = n, the amount of leakage is increased due to the shape error of machining, eccentricity of assembly, and the like. Fig.2 Neutral principle for the design of throttle structure with pneumatic instrument Fig.1 Air pump (same as Fig. 1) QFP-5-2 flow type pneumatic measuring instrument L-10B specimen can be rotated during test G handle to make the valve down, when the float to the lowest position in the buoy, then by m, n two sealing strip leaking air volume equal to the handle position at this time for the throttle valve is the best place to be shut down. Leaving this optimal position, the spool moves up or down the buoy, which indicates an increase in leakage. When the type test can be based on the minimum amount of leakage for the dead position to determine the handle limit structure size. Also in the structural design to reduce the width of the grooving groove or to improve the form of tolerance requirements and other aspects of improvement in order to reduce the amount of leakage at the closed position, the test data in Table 2. Table 2 Neutral detection data of throttle structure design Item No. 1 2 3 4 5 Position of the buoy when the handle is closed (grid) 2.1 2.8 3.5 6.2 7.8 Amount of downward movement of the valve spool (mm) 0.08 0.11 0.10 0.15 0.22 with the test handle to the lowest position of the buoy (grid) 1.9 2.5 3.3 5.6 6.5 It can be seen from the data in Table 2 that the downward movement amount of Valve No. 5 is larger, and the measured leakage after moving is reduced by about 2.5 mL / min. Valve 5 leaked 22 mL / min (as per JB 2144-77) before moving and 19.5 mL / min after moving. According to JB 2146-77 provisions of the throttle shut-off when the amount of leakage does not exceed 20mL / min technical indicators have been substandard products have become qualified products. Domestic Q-type valve in the throttle structure and L-shaped throttle consistent with this test also applies to Q-valve. 3 Conclusions ①The use of pneumatic instrumentation to check the neutrality of the hydraulic control valve is a quick, labor-saving and energy-saving test method suitable for type test, which is an effective test method for improving structural design parameters. ② This method But also can be used as an effective method of sampling the quality of products (such as internal leakage) by the factory quality control personnel; ③ For each hydraulic part factory, the pneumatic measurement technology is widely used in the parts processing, so the gas source and the pneumatic gauge are well-equipped , There is little investment in using this method for online measurements. So it's practical. Abstract: A new method of detecting neutrality of a hydraulic control valve using a pneumatic gauge is proposed. This method is a fast and practical detection method for the type test of the product stereotypes and the online quality sampling of the mass production of the product. The neutrality of the hydraulic control valve directly affects the static and dynamic characteristics of the valve. For example: the three-way valve reset on the quality of neutral will affect the size of the median valve leakage; domestic flow control valve L-type throttle and Q-speed valve structure on the neutral good or bad To the amount of leakage changes, so that the static characteristics of the change; electro-hydraulic servo valve on the quality of the adverse impact on the pressure gain and bias and so on. Therefore, the hydraulic control valve type test and factory test, the performance as a pilot project in the test content. Hydraulic method to detect the performance of the time-consuming, laborious, energy-hungry, at the same time as the flow through the small gap "jam" phenomenon caused by inaccurate detection. Application of flow (buoyant) pneumatic measuring instrument, due to the transient measurement, so quick and easy; its magnification, no "plugging" phenomenon, so the test is accurate; it detects low pressure, consumption Less time, less energy consumption. Flow pneumatic instrument is actually a buoyant flowmeter. The constant pressure of compressed air flows through the orifice into the conical tube of the flowmeter. The airflow holds the buoy to a certain height and then flows to the nozzle along the annular gap around the buoy and escapes into the atmosphere from the measurement gap. If the pneumatic gauge probe or measuring device is removed, then through the buoy ring around the air gap directly to the hydraulic control valve sealing gap jet, then with the sealing gap, through the sealing area of ​​the gas flow (leakage) is different, the buoy The indication height is also different [2]. Neutral good or bad, will affect the leakage changes, so the pneumatic gauge float position will change. 1 Pneumatic measuring instrument used to detect the reset of the three spool neutral detection principle shown in Figure 1. Pneumatic gauge of the two tubes with the same reference calibration. Will be back to the oil port E, F blocked, control port A, B were connected a, b pneumatic tube, from the inlet C exhaust. If the pneumatic gauge buoy height of two tubes is basically the same, then the air flow through the middle of the slide valve sealing tape m, n leakage gas volume is basically the same, indicating that the reset valve spool good neutrality, of which the total amount of leakage should Is the smallest. If the two buoys are inconsistent, the higher ones indicate that the sealing band has a large amount of leakage and a low amount of leakage, and its reset neutrality is not good and the total amount of leakage in the valve is increased. Pneumatic gauge buoy height instructions translated into a slide valve leakage of liquid can be seen in reference [3]. Figure 1 Pneumatic three-position ball valve to detect neutral principle 1. Pump 2. Water separator 3. Pressure reducing valve 4. Shut-off valve 5. Pressure gauge 6. QFP-5-5 Flow Pneumatic Meter 7. 35D-10B specimen It should be noted here is: Pneumatic gauge buoy position is the height of the seal that means "integrated" the size of the gap, it is sealed with the seal length and sealing gap size, and shoulder and undercut The degree of the sharp edge of the groove control edge and the processing accuracy of the shoulder and the valve hole and other factors. Therefore, the neutrality here does not mean that the amount of occlusion of the negative opening of the middle finger is symmetrical, but is measured by whether the amount of leakage is consistent or not. If the processing accuracy is high, the general amount of cover should be basically symmetrical. If the neutral is not good, in the test used to move the valve spool to change its cover the amount of test methods. Structurally available to change the length of the reset spring to solve. The test data in Table 1. The median amount of leakage of the tested valve after the move showed that the leakage of valve No. 5 was significantly reduced by about 3.5 mL / min before the shift. The remaining 1, 2, 3 also reduced 1 ~ 2mL / min. For the electro-hydraulic servo valve selected specimen is FM-31 type, the valve is in the middle of each valve port near zero openings. Can also be measured with the method of Figure 1 for testing, and then measured by the valve spool shoulder with close to zero openings, the test can be found in reference [4]. 2 Pneumatic meter to detect the design of the throttle on the neutral Table 1 Three-way spool valve neutral test data items test piece number 1 2 3 4 5 buoy location (grid) a tube -7.5 -5.5 -8.5 -9.0 -9.0 b Tube -7.0 -7.0 -7.5 -9.0 -4.0 Spindle axial movement (mm) Right shift 0.10 Right shift 0.15 Right shift 0.20 0 Right shift 0.30 Position of the buoy after moving (cell) a Tube -7.3 -6.4 -8.2 -9.0 -6.6 b Tube -7.3 -6.4 -8.2 -9.0 -6.6 The principle of detection is shown in Fig. Using a tube of a dual-tube pneumatic gauge, block a during calibration, and zero the set screw so that the buoy is in the "0" position. Select a leakage of 20mL / min throttle connected by the map, adjust the ratio can be good. A meter instrument connected to the throttle inlet A, airflow through the m sealing tape through the orifice E from the oil outlet B, while the air flow through the n-sealing triangle flow through the handle B from the B port. When the handle G is dead, if the valve core, valve hole machining accuracy, m and n are equal, then the throttle valve leakage should be minimal. If the triangle groove processing is not accurate, or the handle is dead when the limit is not good so that m ≠n, then the amount of leakage will increase. Even when m = n, the amount of leakage is increased due to the shape error of machining, eccentricity of assembly, and the like. Fig.2 Neutral principle for the design of throttle structure with pneumatic instrument Fig.1 Air pump (same as Fig. 1) QFP-5-2 flow type pneumatic measuring instrument L-10B specimen can be rotated during test G handle to make the valve down, when the float to the lowest position in the buoy, then by m, n two sealing strip leaking air volume equal to the handle position at this time for the throttle valve is the best place to be shut down. Leaving this optimal position, the spool moves up or down the buoy, which indicates an increase in leakage. When the type test can be based on the minimum amount of leakage for the dead position to determine the handle limit structure size. Also in the structural design to reduce the width of the grooving groove or to improve the form of tolerance requirements and other aspects of improvement in order to reduce the amount of leakage at the closed position, the test data in Table 2. Table 2 Neutral detection data of throttle structure design Item No. 1 2 3 4 5 Position of the buoy when the handle is closed (grid) 2.1 2.8 3.5 6.2 7.8 Amount of downward movement of the valve spool (mm) 0.08 0.11 0.10 0.15 0.22 with the test handle to the lowest position of the buoy (grid) 1.9 2.5 3.3 5.6 6.5 It can be seen from the data in Table 2 that the downward movement amount of Valve No. 5 is larger, and the measured leakage after moving is reduced by about 2.5 mL / min. Valve 5 leaked 22 mL / min (as per JB 2144-77) before moving and 19.5 mL / min after moving. According to JB 2146-77 provisions of the throttle shut-off when the amount of leakage does not exceed 20mL / min technical indicators have been substandard products have become qualified products. Domestic Q-type valve in the throttle structure and L-shaped throttle consistent with this test also applies to Q-valve. 3 Conclusions ①The use of pneumatic instrumentation to check the neutrality of the hydraulic control valve is a quick, labor-saving and energy-saving test method suitable for type test, which is an effective test method for improving structural design parameters. ② This method But also can be used as an effective method of sampling the quality of products (such as internal leakage) by the factory quality control personnel; ③ For each hydraulic part factory, the pneumatic measurement technology is widely used in the parts processing, so the gas source and the pneumatic gauge are well-equipped , There is little investment in using this method for online measurements. So it's practical. Item Specimen No. 1 2 3 4 5 Position of the buoy (frame) a Tube -7.5 -5.5 -8.5 -9.0 -9.0 b Tube -7.0 -7.0 -7.5 -9.0 -4.0 Spindle axial movement (mm) Right Shift 0.10 Right shift 0.15 Right shift 0.20 0 Right shift 0.30 Position of the buoy after moving (cell) a pipe -7.3 -6.4 -8.2 -9.0 -6.6 b pipe -7.3 -6.4 -8.2 -9.0 -6.6 Item Test piece No. 1 2 3 4 5 Position of the buoy when the handle is closed (grid) 2.1 2.8 3.5 6.2 7.8 Amount of downward movement of the spool (mm) 0.08 0.11 0.10 0.15 0.22 Lowest position of the buoy (test cell) with test handle 1.9 2.5 3.3 5.6 6.5
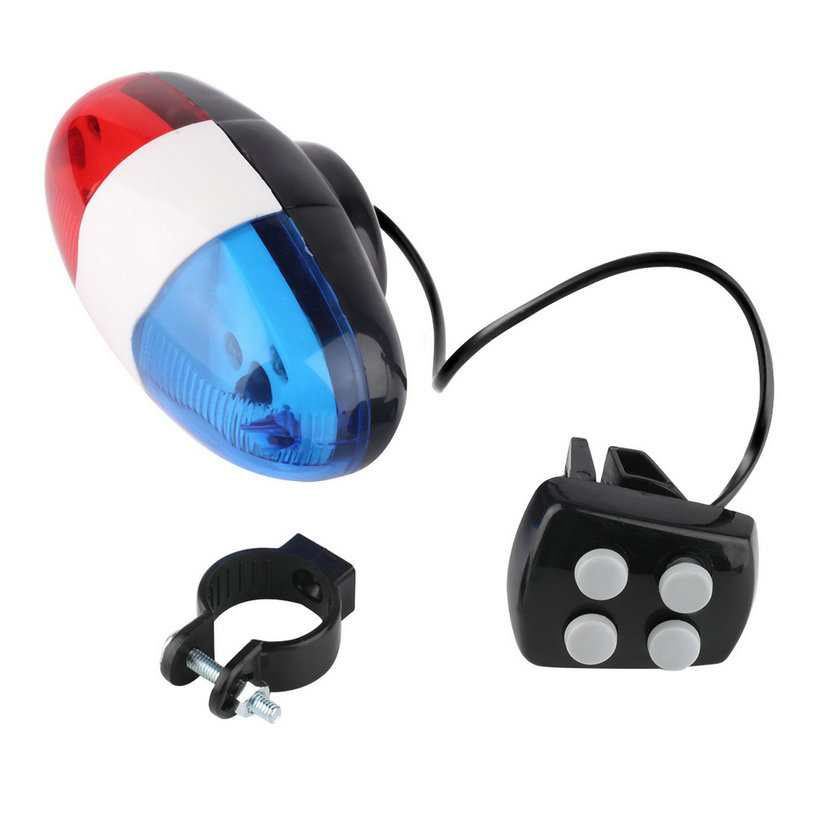
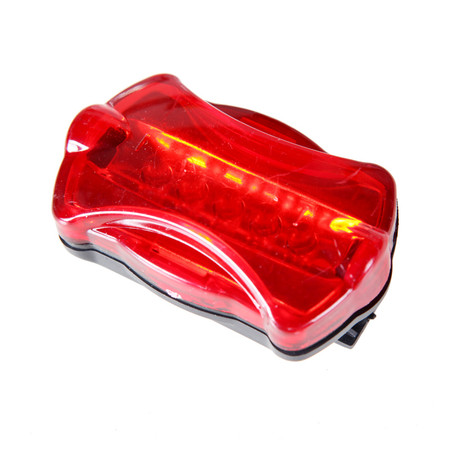
IKIA Bike Light
The
Bicycle light adopt latest light-focusing technology. Triple brightness than
similar products.
Multi-function, guiding your way in the darkness. And rear safety flashlight. It
is resistant for water, oil and shock. Suitable for any bicycle to give alert in
bad weather and for bicycle, jogging, climbing, baby trolley/stroller,
wheelchair. the OEM and ODM can accepted .

Key Specifications
Material:Plastic
color :red ,black
Size : any size all avaliable
Application :any bicycles
Packing : polybag and carton or according requirment

Service:
1.
Small MOQ , Usually sample is available.
2. Support OEM & ODM: we can print logo or customs package according
to our client`s requirement.
3. Top quality : We have professional team to control the quality.
4. We work with DHL, UPS, FedEx, TNT and EMS for small order. For
large order we can arrange shipment by air or by sea.
5. Satisfactory service : We treat clients as friends and 24 hours customer
service.
Bike Light
Bike Light,Bike Led Light,Bike Dynamo Light,Bicycle Led Light
Hebei YIJIASHUN Trading Co.,Ltd , https://www.ikiabicycle.com

